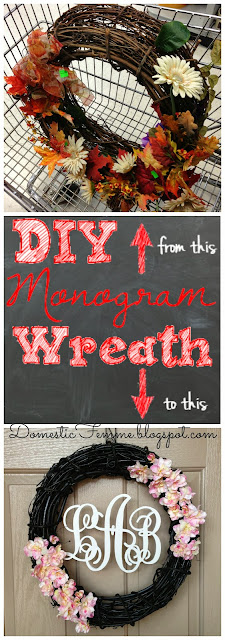
You're at the right place, if you read this tutorial for making a Monogram Wreath, and need help making your actual printout.
Download the Monogram KK font here. Open Microsoft Office Word, click on the "Page Layout" tab, and select "Landscape" from the "Orientation" button.
Under the same "Page Layout" tab, select "Narrow" from the "Margins" button.
Go to the "Home" tab, select "Monogram kk sc" from the drop-down box, change the font size to 365, click the "B" below, to bold your font, and center the paragraph {the one highlighted above the word "Paragraph"}.
Type out the initials you want, and take a screenshot {I use Jing} of each individual letter, saving the three files to your computer - leave MS Word open for later. Go to Pixlr, a free website {no sign up necessary}.
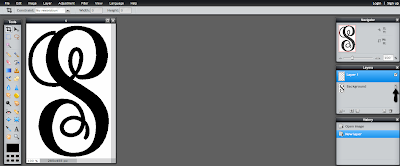
Select "Pixlr Editor" and then "Open image from computer".
Locate the first letter that you saved, highlight it and click "Open".
With the first image open, click "Layer", and then "New Layer".
Double click the padlock icon, until it changes to a check mark.
Drag "Layer 0" until it's above "Layer 1"
Select the wand tool.
Click your wand within a white space, so you see a moving, dotted outline around it.
Hold down the Ctrl button on your keyboard and then tap the letter "X", to cut the selected area. Notice the gray & white checkerboard?
Repeat this process, until all of the white space is removed.
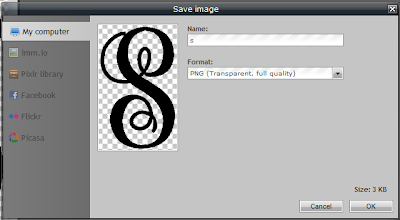
Go to "File" and select "Save".
Keep the original name as before, and ensure the format is set to "PNG". Click "OK".
Click "Yes", when it states that the file already exists and asks if you want to replace it.
Close out the first letter's window, by clicking the X. When it asks you if you want to save the image before closing, click "No".
This window will pop up again. Select "Open image from computer", follow the same steps again for the two remaining letters, removing the white parts, and then save them.
After saving the three individual letter files, go back into MS Word, and delete the letters you typed earlier. Click the "Insert" tab and select the "Picture" option.
Check the box for each of the three files you saved earlier, and click "Insert".
Once you've added the three images, click on one to outline it. While highlighted, under the "Format" tab, click "Text Wrapping" and then "Square". Click on the remaining images and repeat.
Drag the letters around, until they're arranged in the right order. Expand the size of each letter, and ensure the outside letters overlap the middle one.
Double check that your letters are proportional and as big as possible, without going past your print margins.
Print your masterpiece. You're ready to go to the next step and continue with your wreath.
Follow me on Instagram
My latest finds on Pinterest
"Like" Domestic Femme on Facebook
Don't miss out on future projects and recipes! Subscribe by email, at the bottom of this page.


